A no-cost Personal Financial Management tool from Pioneer Bank & Trust
Save hundreds of dollars every year by tracking spending, setting goals and establishing realistic budgets.
Why Use Pioneer Money Manager?
Pioneer Money Manager is going to give you financial control and save you time and money. You’ll know where your money goes, how much you are saving, and be able to set goals and track progress. You can sync accounts with nearly 20,000 financial institutions.
Pioneer Money Manager How To:
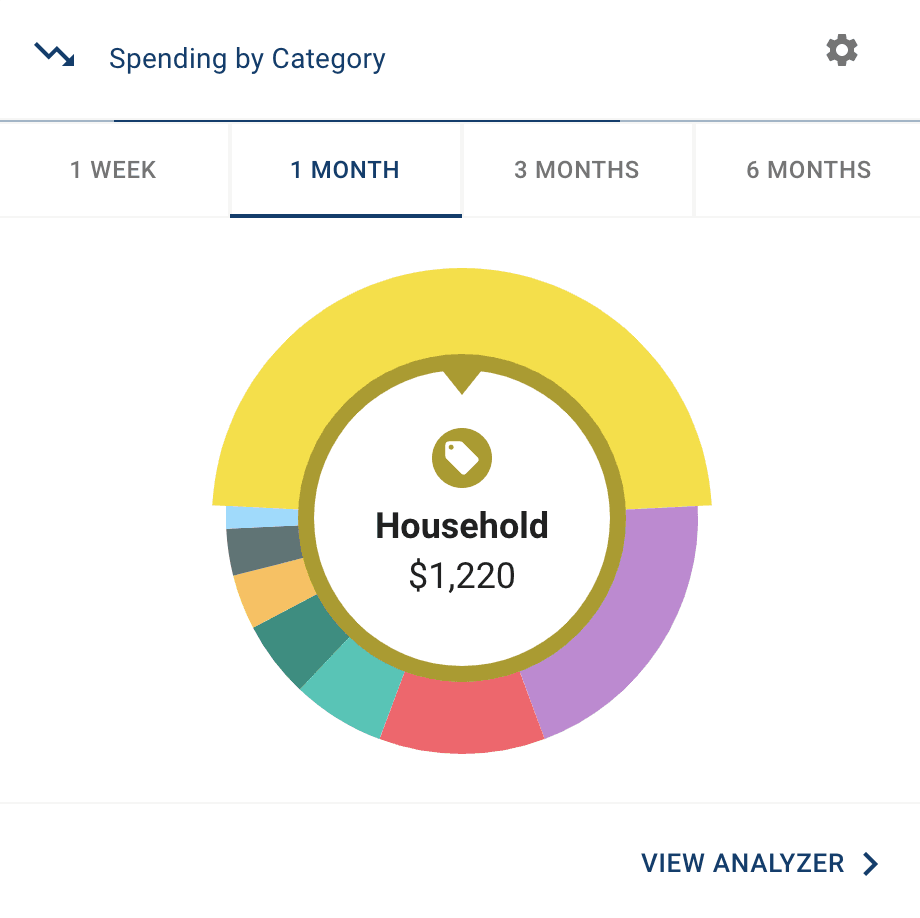
Dashboard
See which spending category you have spent the most in so far this month.
Step 1: Select other parts of the wheel to see other major category spending. Your transactions will categorize themselves with ‘tags’.
Step 2: To personalize these categories, or split the transaction between tags, select the transaction and edit the tag.
Step 3: When you select a transaction from the dashboard you can also change the name of the transaction, create a budget or add a recurring transaction to your Cashflow Calendar.
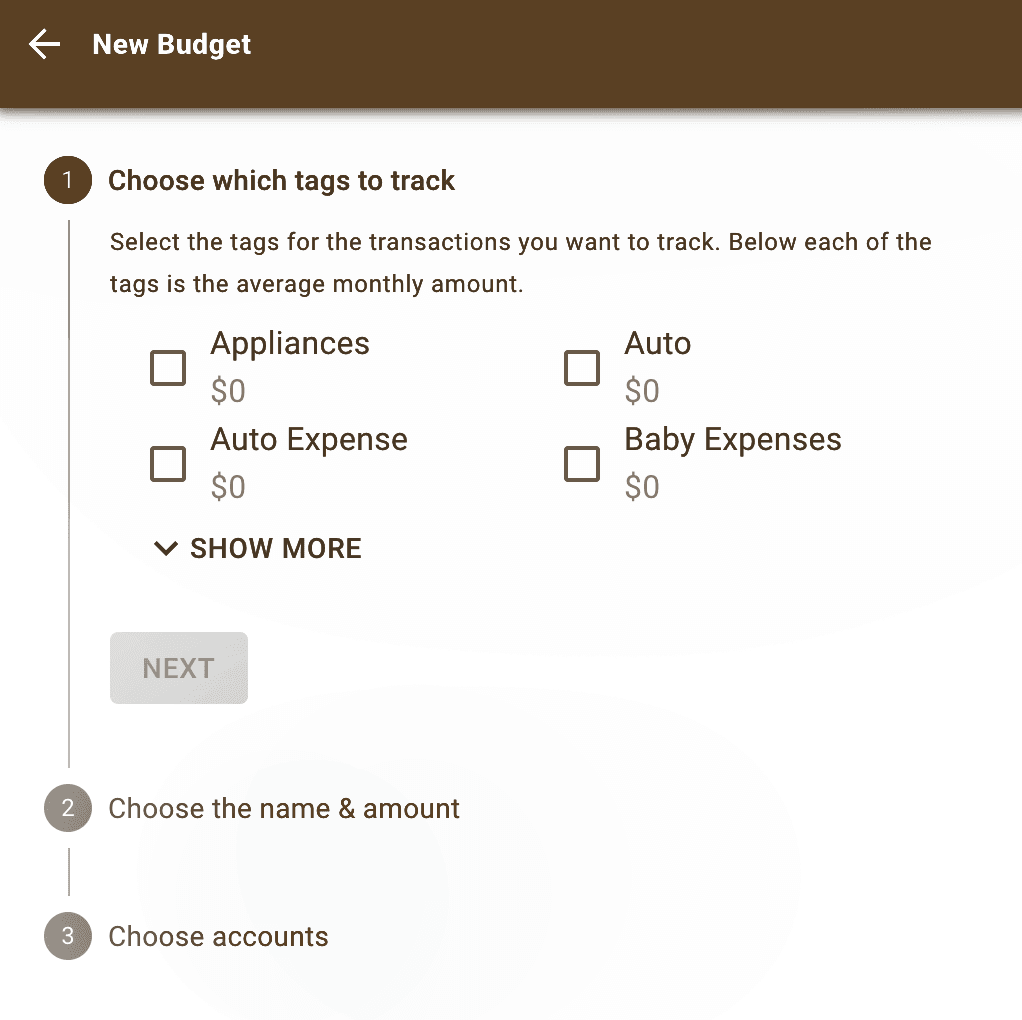
Spending Targets
New users can look at the insights for guidance on what to budget based on spending.
Step 1: Navigate to Budgets and click on “View Budgets.”
Step 2: Click on the Spending Target you’d like to edit from the list.
Step 3: Click “Edit Budget” to edit or delete.
Step 4: You can change the name, amount, tags, and accounts associated with this Spending Target from here.
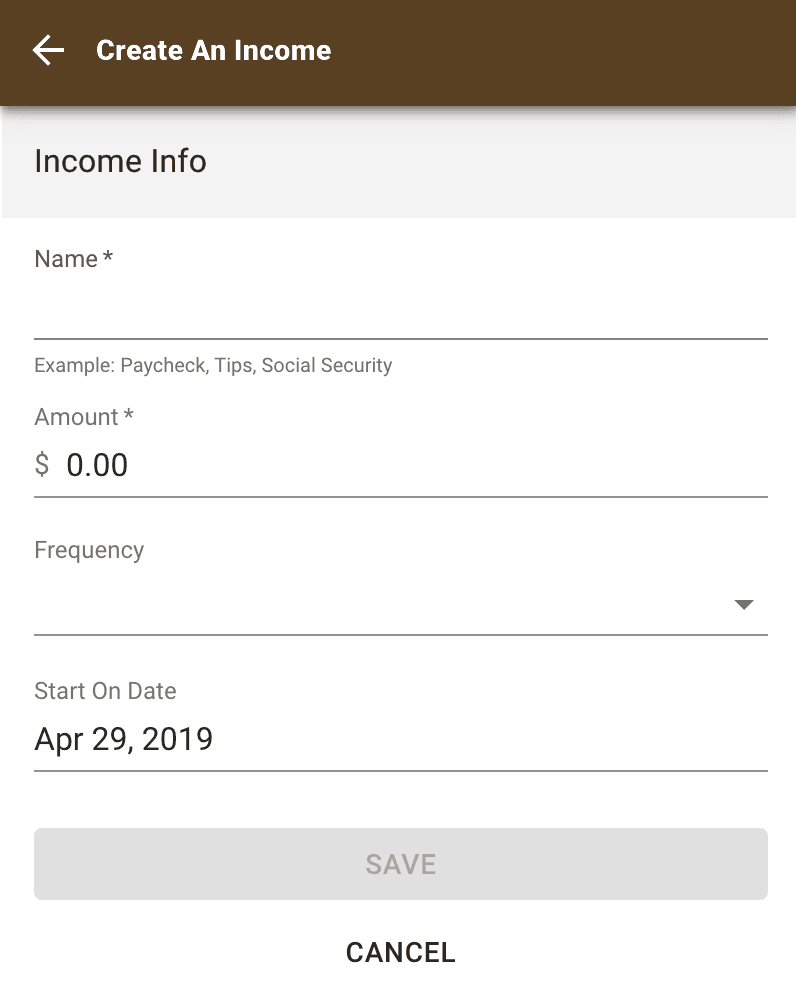
Cashflow
The cash flow calendar brings your budget to life through an interactive calendar.
Step 1: Navigate to Cashflow.
Step 2: Click the plus sign to “Add Income” or “Add Bill.”
Step 3: Enter in the required information and select “Save.”
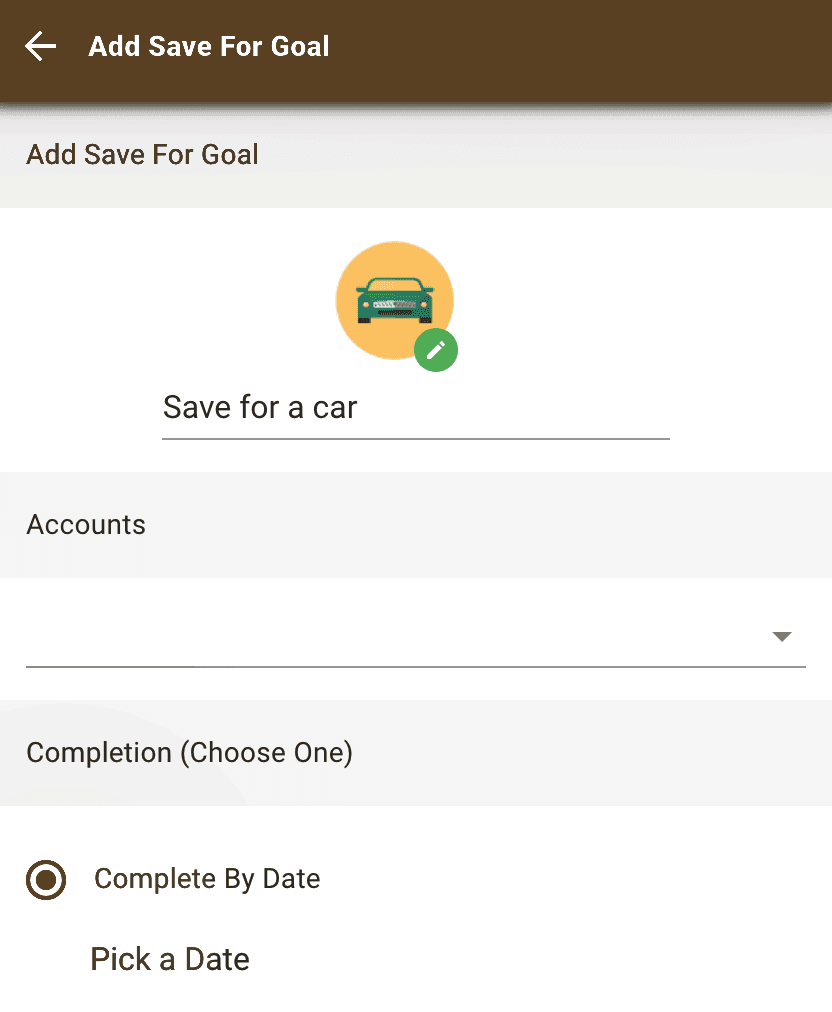
Goals
Create savings goals, like saving for a vacation, or a debt reduction goal, like paying off a high-rate credit card.
Step 1: Navigate to Goals, and select “Add Goal.”
Step 2: Select your desired pay off or savings goal.
Step 3: Fill in the required information.
Step 4: Click “Save” to complete the process of adding a new goal.
Keep in mind, your Goal Summary will update your completion date and the amount needed per month according to your preferences. Goals will automatically update your progress and will reflect your day-to-day account balances in PFM.
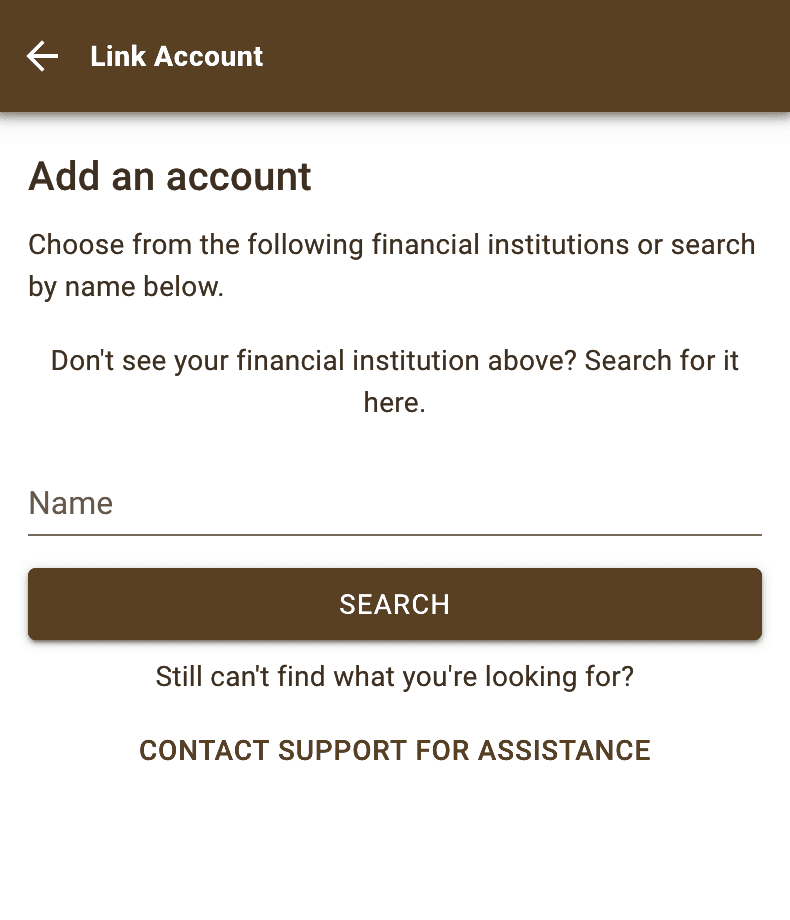
Add an Account
Syncing other accounts for a complete financial picture is simple.
Step 1: Navigate to Accounts, and click the plus sign to “Add Linked Account.”
Step 2: Select an institution or use the search to find your institution.
Step 3: Enter in the required information and select “Connect.”
You’ll receive a notification on your PFM dashboard once the account has been synced successfully.
Try our official mobile apps!
Leaving Pioneer Bank & Trust
You are now leaving the Pioneer Bank & Trust website. This site may have a privacy policy and security different than Pioneer Bank & Trust.